linuxium@Byte-3:~$ lsb_release -a
Distributor ID: Ubuntu
Description: Ubuntu 17.04
Release: 17.04
Codename: zesty
linuxium@Byte-3:~$
linuxium@Byte-3:~$ uname -a
Linux Byte-3 4.10.0-19-generic #21-Ubuntu SMP Thu Apr 6 17:04:57 UTC 2017 x86_64 x86_64 x86_64 GNU/Linux
linuxium@Byte-3:~$
linuxium@Byte-3:~$ inxi -Fc0
System: Host: Byte-3 Kernel: 4.10.0-19-generic x86_64 (64 bit)
Desktop: Gnome Distro: Ubuntu 17.04
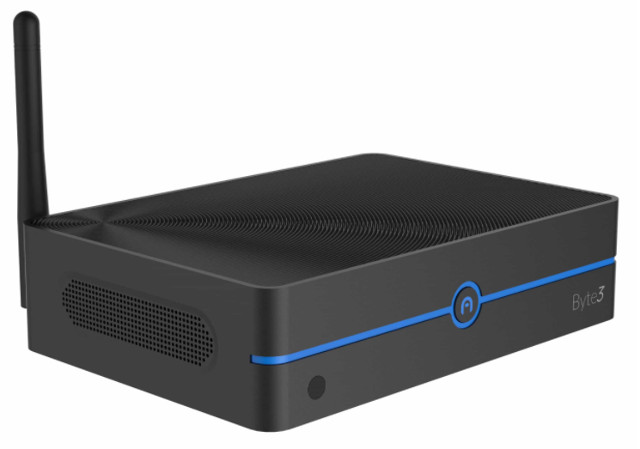
Machine: Device: desktop System: Azulle product: Byte 3
Mobo: N/A model: N/A
UEFI: American Megatrends v: 5.12 date: 08/21/2017
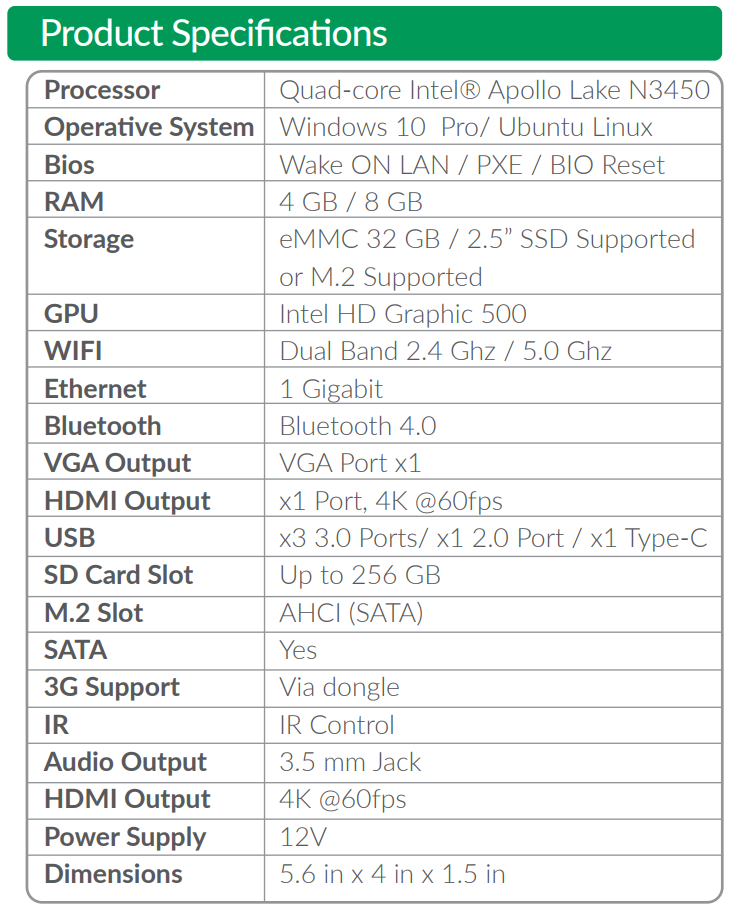
CPU: Quad core Intel Celeron N3450 (-MCP-) cache: 1024 KB
clock speeds: max: 2200 MHz 1: 2157 MHz 2: 1767 MHz 3: 2174 MHz
4: 2136 MHz
Graphics: Card: Intel Device 5a85
Display Server: X.Org 1.19.3 drivers: modesetting (unloaded: fbdev,vesa)
Resolution: 1920x1080@60.00hz
GLX Renderer: Mesa DRI Intel HD Graphics 500 (Broxton 2x6)
GLX Version: 3.0 Mesa 17.0.7
Audio: Card Intel Celeron N3350/Pentium N4200/Atom E3900 Series Audio Cluster
driver: snd_hda_intel
Sound: Advanced Linux Sound Architecture v: k4.10.0-19-generic
Network: Card-1: Realtek RTL8111/8168/8411 PCI Express Gigabit Ethernet Controller
driver: r8169
IF: enp1s0 state: up speed: 1000 Mbps duplex: full
mac: 00:ce:39:cd:50:69
Card-2: Intel Wireless 3165 driver: iwlwifi
IF: wlp2s0 state: down mac: 2e:5c:dd:13:b5:86
Drives: HDD Total Size: NA (-)
ID-1: /dev/mmcblk0 model: N/A size: 31.3GB
Partition: ID-1: / size: 9.8G used: 6.1G (65%) fs: ext4 dev: /dev/mmcblk0p5
RAID: No RAID devices: /proc/mdstat, md_mod kernel module present
Sensors: System Temperatures: cpu: 40.0C mobo: N/A
Fan Speeds (in rpm): cpu: N/A
Info: Processes: 212 Uptime: 2:06 Memory: 891.2/3782.6MB
Client: Shell (review-tests.sh) inxi: 2.3.8
linuxium@Byte-3:~$
linuxium@Byte-3:~$ df -h
Filesystem Size Used Avail Use% Mounted on
udev 1.9G 0 1.9G 0% /dev
tmpfs 379M 12M 368M 3% /run
/dev/mmcblk0p5 9.8G 6.1G 3.3G 65% /
tmpfs 1.9G 12K 1.9G 1% /dev/shm
tmpfs 5.0M 4.0K 5.0M 1% /run/lock
tmpfs 1.9G 0 1.9G 0% /sys/fs/cgroup
/dev/mmcblk0p2 96M 77M 20M 80% /boot/efi
tmpfs 379M 168K 379M 1% /run/user/1000
/dev/mmcblk0p4 19G 14G 5.0G 74% /media/linuxium/7CA24909A248C97A
linuxium@Byte-3:~$
linuxium@Byte-3:~$ lsblk -a
NAME MAJ:MIN RM SIZE RO TYPE MOUNTPOINT
loop0 7:0 0 0 loop
loop1 7:1 0 0 loop
loop2 7:2 0 0 loop
loop3 7:3 0 0 loop
loop4 7:4 0 0 loop
loop5 7:5 0 0 loop
loop6 7:6 0 0 loop
loop7 7:7 0 0 loop
mmcblk0 179:0 0 29.1G 0 disk
├─mmcblk0p1 179:1 0 499M 0 part
├─mmcblk0p2 179:2 0 100M 0 part /boot/efi
├─mmcblk0p3 179:3 0 16M 0 part
├─mmcblk0p4 179:4 0 18.5G 0 part /media/linuxium/7CA24909A248C97A
└─mmcblk0p5 179:5 0 10G 0 part /
mmcblk0boot0 179:8 0 4M 1 disk
mmcblk0boot1 179:16 0 4M 1 disk
mmcblk0rpmb 179:24 0 4M 0 disk
linuxium@Byte-3:~$
linuxium@Byte-3:~$ sudo lshw -C cpu
*-cpu
description: CPU
product: Intel(R) Celeron(R) CPU N3450 @ 1.10GHz
vendor: Intel Corp.
physical id: 37
bus info: cpu@0
version: Intel(R) Celeron(R) CPU N3450 @ 1.10GHz
slot: SOCKET 0
size: 2097MHz
capacity: 2400MHz
width: 64 bits
clock: 100MHz
capabilities: x86-64 fpu fpu_exception wp vme de pse tsc msr pae mce cx8 apic sep mtrr pge mca cmov pat pse36 clflush dts acpi mmx fxsr sse sse2 ss ht tm pbe syscall nx pdpe1gb rdtscp constant_tsc art arch_perfmon pebs bts rep_good nopl xtopology tsc_reliable nonstop_tsc aperfmperf tsc_known_freq pni pclmulqdq dtes64 monitor ds_cpl vmx est tm2 ssse3 sdbg cx16 xtpr pdcm sse4_1 sse4_2 x2apic movbe popcnt tsc_deadline_timer aes xsave rdrand lahf_lm 3dnowprefetch cat_l2 intel_pt tpr_shadow vnmi flexpriority ept vpid fsgsbase tsc_adjust smep erms mpx rdt_a rdseed smap clflushopt sha_ni xsaveopt xsavec xgetbv1 xsaves dtherm ida arat pln pts cpufreq
configuration: cores=4 enabledcores=4 threads=4
linuxium@Byte-3:~$
linuxium@Byte-3:~$ sudo lshw -C memory
*-firmware:0
description: BIOS
vendor: American Megatrends Inc.
physical id: 0
version: 5.12
date: 08/21/2017
size: 64KiB
capacity: 5056KiB
capabilities: pci upgrade shadowing cdboot bootselect socketedrom edd int13floppy1200 int13floppy720 int13floppy2880 int5printscreen int14serial int17printer acpi usb biosbootspecification uefi
*-memory
description: System Memory
physical id: 2f
slot: System board or motherboard
size: 4GiB
*-bank:0
description: DIMM DDR3 Synchronous 1600 MHz (0.6 ns)
product: 123456789012345678
vendor: ABCD
physical id: 0
serial: 1234
slot: ChannelA-DIMM0
size: 2GiB
width: 16 bits
clock: 1600MHz (0.6ns)
*-bank:1
description: DIMM DDR3 Synchronous 1600 MHz (0.6 ns)
product: 123456789012345678
vendor: ABCD
physical id: 1
serial: 1234
slot: ChannelA-DIMM1
size: 2GiB
width: 16 bits
clock: 1600MHz (0.6ns)
*-bank:2
description: DIMMProject-Id-Version: lshwReport-Msgid-Bugs-To: FULL NAME <EMAIL@ADDRESS>POT-Creation-Date: 2009-10-08 14:02+0200PO-Revision-Date: 2012-02-02 13:04+0000Last-Translator: Joel Addison <jaddi27@gmail.com>Language-Team: English (Australia) <en_AU@li.org>MIME-Version: 1.0Content-Type: text/plain; charset=UTF-8Content-Transfer-Encoding: 8bitX-Launchpad-Export-Date: 2017-04-04 11:54+0000X-Generator: Launchpad (build 18335) [empty]
physical id: 2
slot: ChannelB-DIMM0
*-firmware:1
description: BIOS
physical id: 3200
size: 1MiB
capacity: 2560KiB
capabilities: isa mca bootselect socketedrom pcmciaboot edd int13floppytoshiba
*-firmware:2
description: BIOS
physical id: 3031
size: 863KiB
*-cache:0
description: L1 cache
physical id: 35
slot: CPU Internal L1
size: 224KiB
capacity: 224KiB
capabilities: synchronous internal write-back
configuration: level=1
*-cache:1
description: L2 cache
physical id: 36
slot: CPU Internal L2
size: 2MiB
capacity: 2MiB
capabilities: synchronous internal write-back unified
configuration: level=2
linuxium@Byte-3:~$
linuxium@Byte-3:~$ free -mh
total used free shared buff/cache available
Mem: 3.7G 749M 1.5G 255M 1.4G 2.4G
Swap: 472M 0B 472M
linuxium@Byte-3:~$
linuxium@Byte-3:~$ sudo lshw -C network
*-network
description: Ethernet interface
product: RTL8111/8168/8411 PCI Express Gigabit Ethernet Controller
vendor: Realtek Semiconductor Co., Ltd.
physical id: 0
bus info: pci@0000:01:00.0
logical name: enp1s0
version: 0c
serial: 00:ce:39:cd:50:69
size: 1Gbit/s
capacity: 1Gbit/s
width: 64 bits
clock: 33MHz
capabilities: pm msi pciexpress msix vpd bus_master cap_list ethernet physical tp mii 10bt 10bt-fd 100bt 100bt-fd 1000bt 1000bt-fd autonegotiation
configuration: autonegotiation=on broadcast=yes driver=r8169 driverversion=2.3LK-NAPI duplex=full firmware=rtl8168g-2_0.0.1 02/06/13 ip=XXX.XXX.XXX.XXX latency=0 link=yes multicast=yes port=MII speed=1Gbit/s
resources: irq:369 ioport:e000(size=256) memory:c1204000-c1204fff memory:c1200000-c1203fff
*-network
description: Wireless interface
product: Wireless 3165
vendor: Intel Corporation
physical id: 0
bus info: pci@0000:02:00.0
logical name: wlp2s0
version: 91
serial: 2e:5c:dd:13:b5:86
width: 64 bits
clock: 33MHz
capabilities: pm msi pciexpress bus_master cap_list ethernet physical wireless
configuration: broadcast=yes driver=iwlwifi driverversion=4.10.0-19-generic firmware=22.391740.0 latency=0 link=no multicast=yes wireless=IEEE 802.11
resources: irq:372 memory:c1100000-c1101fff
linuxium@Byte-3:~$
linuxium@Byte-3:~$ dmesg | grep "MMC card"
[ 2.700615] mmc0: new HS200 MMC card at address 0001
linuxium@Byte-3:~$