U5PVR with Enigma2
Hello.From today, U5PVR can supports Enigma2.
Please follow the procedure below to use dual boot on U5PVR Deluxe mode.
Please download the file from the link below.
This is update.zip file to upgrade U5PVR Deluxe model.- Full version : https://drive.google.com/open?
id=1OhEM7L9sj9GMh1nTG8t5RUPBSqFr5xkF : will clean current DB. - Normal version : https://drive.google.com/
open?id=1WwEbzaQ-K52_kNL9Wvx4nPYyk6_aL7t0 : will keep current DB.
To use Enigma2, Please upgrade the same file twice times with update.zip file.After upgrading 2 times of update.zip file, Let's prepare SD card.
Download the Enigma2 Micro SD card image (openatv-6.1-dinobot4kse-201xxxxxx_mmc.zip) from the link below.
http://images.mynonpublic.com/openatv/nightly/index.php?open=dinobot4kse
Please extract download file then you will find below files.
To burn the SD card image,
https://sourceforge.net/projects/win32diskimager/ Download Win32 Disk Imager program.
When you run the downloaded program, it will appear as below.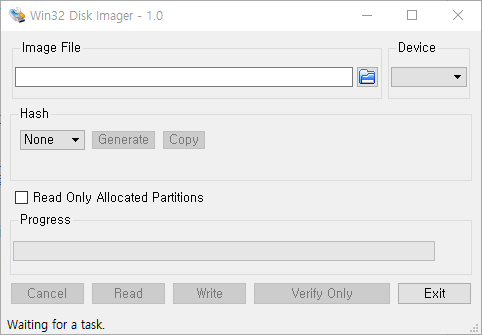
Select img file to burn your SD card.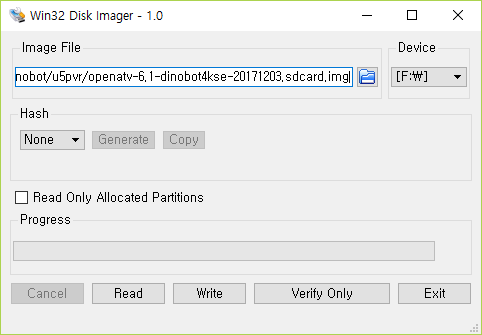
Select your SD card driver.
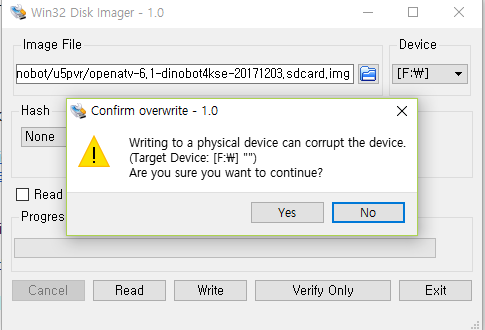
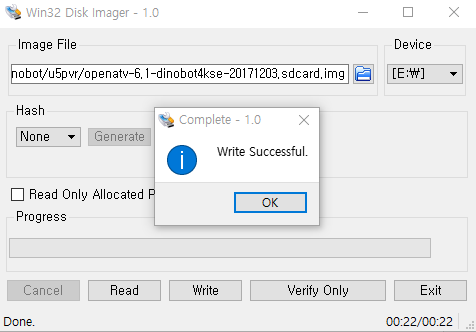
Wait until finish writing of SC card.
After burning SD card, please put SD card to U5PVR 's Micro SD slot.
Confirm the advance check.
Please follow the procedure below to use dual boot on U5PVR Deluxe mode.
Please download the file from the link below.
This is update.zip file to upgrade U5PVR Deluxe model.
Download the Enigma2 Micro SD card image (openatv-6.1-dinobot4kse-201xxxxxx_mmc.zip) from the link below.
http://images.mynonpublic.com/openatv/nightly/index.php?open=dinobot4kse

Select img file to burn your SD card.

Select your SD card driver.
Wait until finish writing of SC card.
To use OpenATV image, you have to do two things as shown below.
1. Mac Address must be same as the Mac address below printed label on the box to enable Enigma2.(Enigma2 will not work if the Mac address is not the same as the Mac address printed below the product.)
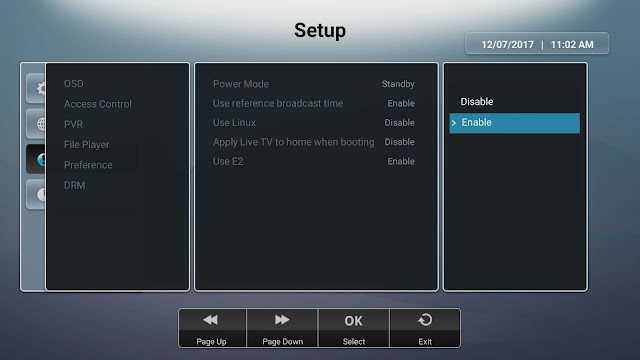
2. After booting Android only Mode, LIVE TV App,Menu ==> System ==> Misc ==> Preference ==> Use E2 ==> Enable.Reboot the box after setting.
If you select dual boot mode with E2, you can know whether it works in E2 mode by LED as below.After "boot" message appears on the LED window, LED message "NENU" is displayed. From now on, the box will operate in Dual Boot mode.
Booting E2.
NENU (MENU) appears as below picture after "boot" message appears on LED window.At this time, if you press the RED key on the remote control, box will start with Android OS.

If you select dual boot mode with E2, you can know whether it works in E2 mode by LED as below.
To boot directly from Android to E2, select Startup E2 via Power Icon to run as OpenATV.
'Android Mini PC' 카테고리의 다른 글
| U5 SBC 제품발표 및 개발 비하인드 스토리 (1) (0) | 2017.12.12 |
|---|---|
| U5PVR 후속 저가모델 U5 OTT의 HW리뷰 (2) (2) | 2017.12.11 |
| U5PVR 안드로이드TV 7버젼 초기 설정 도우미 메뉴 & 최신FW업그레이드 (0) | 2017.12.06 |
| [U5PVR] TELEBEE (텔레비) 방송 시청앱 설치 중간 보고 (아직 성공하지 못함) (0) | 2017.11.10 |
| [U5PVR] GameSir G3s (무선 게임패드) 유, 무선 2인용 test - 게임 초심자용 (0) | 2017.11.08 |

