CX-01-low heat telechips based stick. specs: 800mhz Telechips tcc8925, Mali400 single core GPU, 512mb ram, 4gb or 8gb flash, wifi b/g/n, micro-usb for power and full size usb. The micro-usb port is nice instead of the mini-usb. It's half the size of the mk802. It lacks a micro-sd card slot and lacks a power button. It seems to have some problems with wifi range and disconnecting. Wifi seems a little slow. Antutu score is around 2150. Plays 720p no problem. 1080p varies depending on the file. Not as nice as the A10 based systems but it will work in a pinch. It's also quite cheap.
UG802-Rockchip rk3066 Dual core based device specs: 1.2GHZ rk3066, Mali400 QUAD-core GPU, 1gb ram, 4gb flash, wifi b/g/n, micro-usb for power, full size usb and micro-sd. Again no power button in software or hardware. Wifi has good range. Antutu score of 6801. Plays 1080p no problem.
Gmail, POP3/SMTP/IMAP4. Emailing is easier than ever before when there is network connection
Multi-Media
Video
Watch online video by connect to internet. local video playing: Video Decoding:Mpeg1/2/4.H.264,VC-1,Divx,Xvid,RM8/9/10,VP6,Video Formats: MKV,TS,TP,M2TS,RM/RMVB,BD-ISO,AVI,MPG,VOB,DAT,ASF,TRP,FLV etc full formats
1번 사항에 대해서는 향후에도 관리 기능에 대한 권한은 제한을 할 예정입니다. 관리 기능 부여로 인하여 CLOUDPC의 설정이 임의로 변경될 수 있어 정상적인 서비스가 되지 않는 경우가 너무 자주 발생하였고 관리자 권한 획득으로 인한 보안 문제 발생 가능성이 있어 제한을 하게 되었습니다.
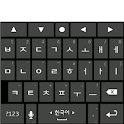
2번 사항에 대해서는 키보드 종류3로 변경하여 테스트해 보았으나 안되신다고 하니 다시 확인해 보도록 하겠습니다.
3번 사항은 사용하시는 Mini PC가 안드로이드 OS 기반이라면 안드로이드용 Citrix Receiver를 설치하여 사용중이신것이죠? 최근에 Receiver 업데이트가 되면서 화면 상단에 메뉴바가 생겼을 것입니다. 메뉴바를 눌러보시면 중간 오른쪽에 스크롤모드와 이동모드를 전환하는 버튼이 있으니 이것을 클릭하여 사용하시면 이전과 같이 위아래로 스크롤이 가능할 것입니다.
4.라이센스 사용에 대한 허가에 승인을 하시면 자동으로 SW를 다운로드 받으실 수 있습니다. (Zip파일로 되어있습니다)
5.이를 설치하시고 SD카드를 포멧을 하신 후, 원하시는 컨텐츠 또는 부트 이미지를 올려서 사용해 보시기 바랍니다.
6.가끔 SD카드 인식 오류에 의하여, SD카드 인식불가와 함께 SD카드 포멧을 하라는 어처구니 없는(?) 메시지가 뜹니다. 이경우는 포멧 메시지를 반드시 무시 하시고, SD카드를 제거 하신 후, 제품 전원을 Off하시기 바랍니다. 그리고 MK802를 재 실행 하시기 바랍니다.
vii.USB 외장 HDD
1.USB 외장 HDD를 사용시에는 반드시 항시전원 – Power Adaptor (파워어뎁터)를 사용하시기 바랍니다.
2.USB 외장 HDD로서 EIDE방식과 SATA방식 HDD의 인식을 확인하였습니다.
3.USB 허브를 통한 USB 외장 HDD 인식도 가능한 것으로 파악되고 있습니다.
4.HDD의 포멧은 FAT32, exFAT32, NTFS방식 포멧에 대한 인식 확인이 필요로 됩니다. --> NTFS방식 포멧 인식 확인 되었습니다..
viii.HDMI to DVI 젠더 및 USB 오디오
1.HDMI TV 또는 HDMI 모니터가 없을 경우, HDMI to DVI젠더를 이용하여 일반 DVI 지원 모니터에서도 사용이 가능합니다.
2.아직 호환성 Test가 확인이 되어지지 않아서, 어떠한 모니터에서 가능하다는 호환성 List는 언급드리기 어렵습니다.
3.또한 주사선에 대한 지원 범위에 대한 차이에 따라서 화면이 짤려서 보일 수도 있습니다.
4.HDMI to DVI젠더 사용시는 DVI는 비디오만 지원이 되기 때문에, Audio는 별도로 지원을 해야 합니다.
5.USB 오디오를 별도로 구입하여 Audio지원을 해 주셔야 합니다.
6.USB 오디오의 경우, 5.1CH 멀티채널을 지원해 주며, SPDIF신호를 처리하여 주거나, 광케이블 아웃을 지원하는 여러가지 제품들이 있습니다.
7.좀 더 오디오쪽에 전문적으로 사용을 검토하시는 분들은 USB 오디오 제품을 선택하시기 바라겠습니다.
8. MK802로 오디오 시스템 환경 구축에 있어서 여러가지 방법이 있을 것 같습니다.
그중 HDMI Pass Through 기능이 있는 리시버가 있을 경우, MK802를 리시버에 꼽아서 사용하는 방법도 가능하리라 보고 있습니다. ^^
viiii.외장형 USB DVD-ROM 드라이브
1. 현재 USB DVD-ROM드라이브는 지원을 하고 있지 않습니다. 스마트폰이나 태블릿PC와 같이고 보시면 되겠습니다. 따로 DVD-ROM 드라이브는 지원 하지 못하고 있습니다.
2. DVD를 iso 파일로 만들어 외장 HDD에 넣어 놓고 DVD를 보듯 사용이 가능할지요?
[LiveSuit 1] LiveSuit의 인사말 입니다. 사용설명을 보겠는지 ? 에 대한 문의 입니다.
No를 선택해 주시기 바랍니다.
[LiveSuit 2] 펌웨어 업그레이 또는 다운그레이드를 할 펌웨어가 있는 디렉토리를 설정해 주시기 바랍니다.
[LiveSuit 3] 선택한 디렉토리에서 펌웨어를 지정해 주시기 바랍니다.
펌웨어는 img명으로 이미지파일로 되어져 있습니다.
[LiveSuit 4] Image 주소를 보시면 선택하신 펌웨어가 제대로 선택되었는지를 확인 해 주시기 바랍니다.
LiveSuit의 펌웨어 upgrade 준비를 마치신 후, MK802의 리셋 Hole에 클립 끝으로 누르신 상태에서 펌웨어 업그레이드를 위한 컴퓨터의 USB포트에 연결한 USB 케이블 전원을 MK802인가 해 주시기 바랍니다.
(주) 컴퓨터 USB포트는 크게 앞부분과 뒷부분이 있습니다. 혹시 앞부분의 USB포트의 전원 공급용량이 부족한 경우가 있습니다. 컴퓨터가 MK802를 인지하지 못한다면, 반드시 뒷부분의 USB포트를 이용하여 전원공급을 해 주시기 바랍니다.
5. See those two small holes on your the front of the MK802 by the HDMI port? One is for the status LED. Poke a paperclip in the other one to press down on a button and while you’re holding down that button connect your MK802 to your PC using a USB to mini USB cable. 6. Your computer will find new hardware but won’t be able to install the drivers properly. 7. Open the Windows Device Manager and look for an “Unknown Device.” 8. Right-click on the device and select the option to “Update Driver.”
9. Choose the option to “Browse my computer for driver software” and navigate to the livesuit directory and select the “UsbDriver” folder.
[LiveSuit 5] MK802에 USB전원인가 후, 약 2초 후에 컴퓨터의 화면에 메시지 창에 뜨게 됩니다.
이렇게 메시지가 뜨면 펌웨어 업그레이드는 거의 완료될 수 있습니다. (여기까지 오시는데 수고 많으셨습니다. ^^)
이 메시지가 뜨지 않는 경우는 여러가지 다른 환경적 변수가 있습니다. 좀 더 확인을 해 보시기 바랍니다.
Select Yes 와 No 차이는 기존 정보를 유지하느냐 아니면 완전 포멧을 하느냐의 차이입니다.
일단 Recommended를 하는 No를 해 보시기를 권장합니다.. (Backup이 필요로 되실 수도 있어서요 ~~)
Go to and click through Settings/Apps/ALL/Android keyboard then click Disable then click OK
Install a "null" keyboard by downloading an app.
So, click on the "Play Store". Enter null keyboard in the search field. You will see apps such as "Null Keyboard" and "Null Input Method" and so on. Install one of those.
Go to and click through Settings/Language & input/KEYBOARD & INPUT METHODS then click Null Input Method in the case that you downloaded the Null Input Method app, and so on for whichever app you downloaded.
You will need to edit a file and change a key mapping. To wit:
As with all the suggestions here, you can screw up your system, so, you make this change at your own risk.
The file is /system/usr/keylayout/Generic.kl
Make a note of what its file permissions are. On our system it is:
-rwxrwxrwx 1 root root 9543 Aug 1 17:06 Generic.kl
Make a copy of this file before continuing.
Change the line:
key 28 DPAD_CENTER
to
key 28 ENTER
If necessary, reset the file permissions as they originally were.
Reboot.
(For whatever it's worth it seems in some non-MK802 systems that key 353 is mapped to "KEY_SELECT" but in others to DPAD_CENTER, so it may be that by us removing it from key 28 we should be mapping it to key 353. But we have not heard of any problem with not doing that, so for now, just consider this bullet a sort of heads up.)
2) USB Keyboard (External) Enter Key unmapped *Edit with Caution. Always make a back up before editing. Used ES Explorer and navigate to /system/usr/keylayout/Generic.kl - Update then save KEY 28 ENTER *Might need to compare old or other Generic.kl to see which other ones was changed. https://github.com/android/platform_fra ... Generic.kl See this one above.


 미니PC 응용범위 121203.pdf


